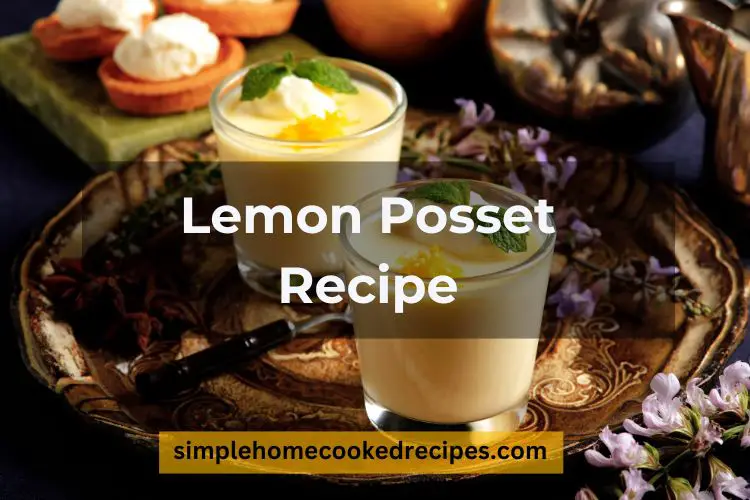
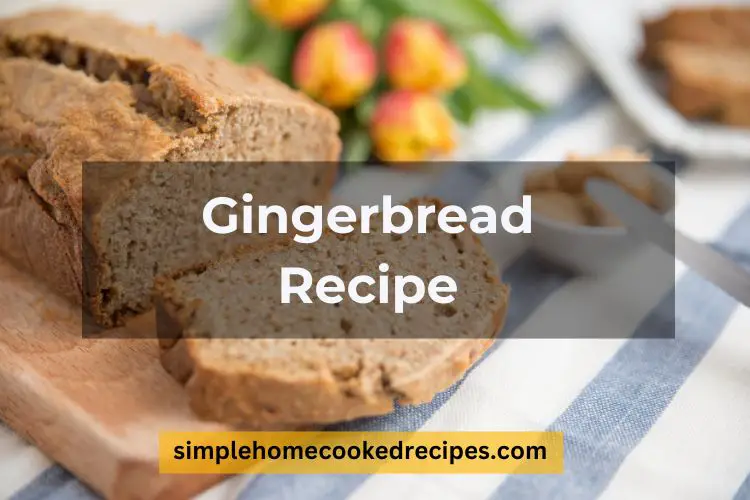
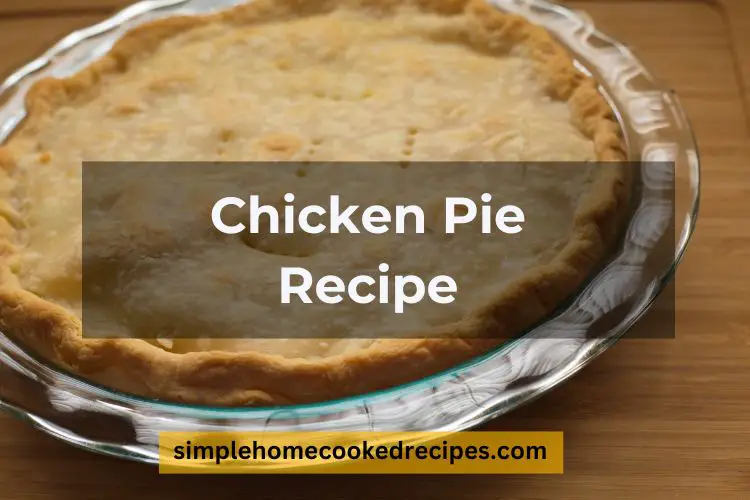
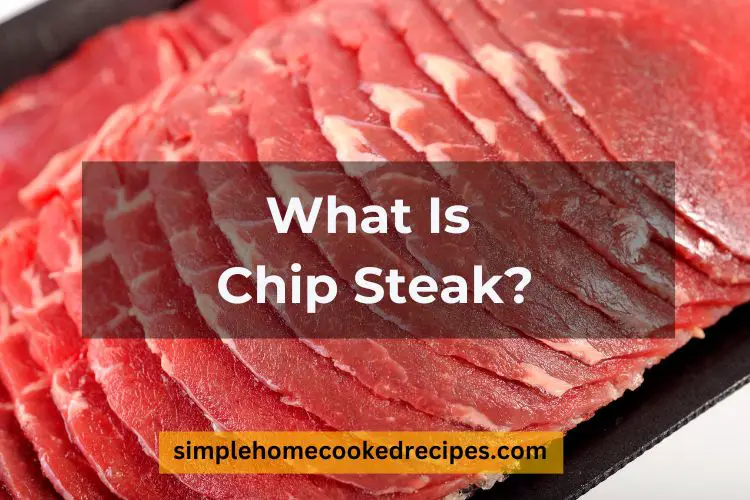
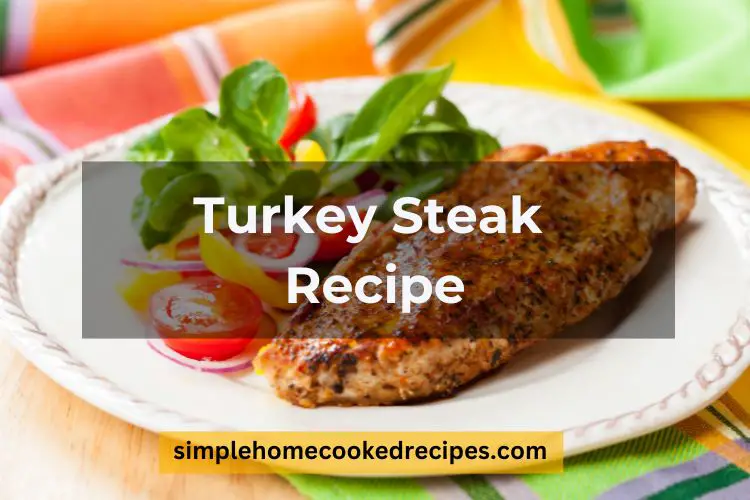
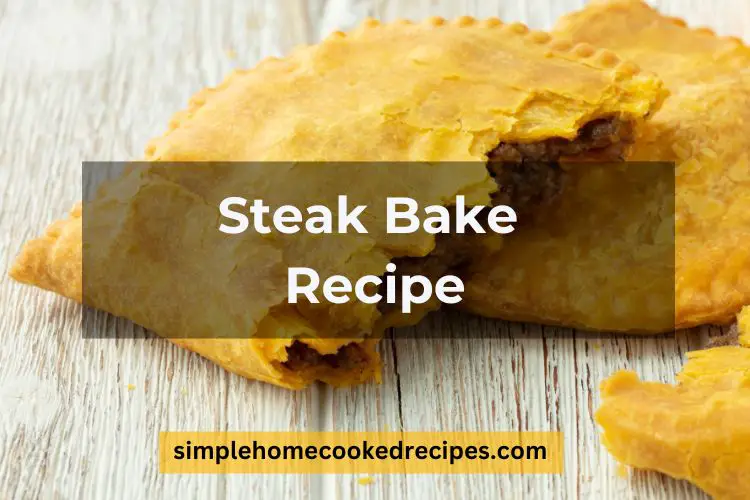
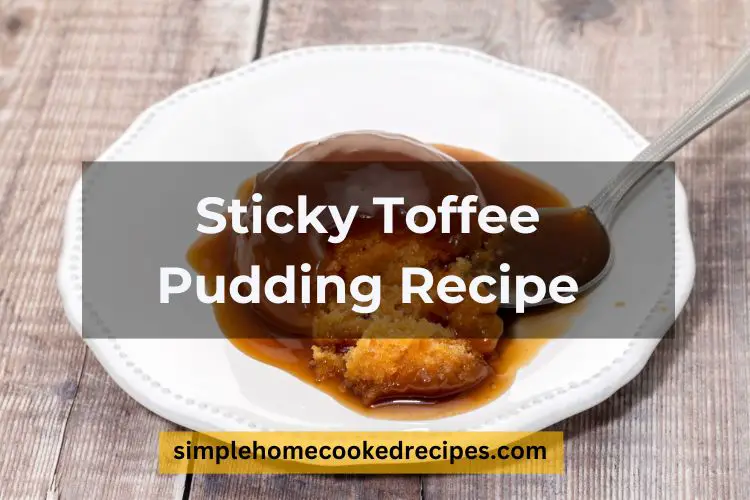
Pasta

Lemon Posset Recipe Mary Berry
The lemon posset recipe is a delicious tart that will provide you with a complex layer of flavours. However, the
Kedgeree Recipe Mary Berry
Kedgeree is the British version of an Indian dish known as Khichri. The dish goes back more than a thousand
Beer Can Chicken Recipe
Beer can chicken is an excellent dish that can help you offer a new but delicious dish to your guests
Gingerbread Recipe Mary Berry 
Gingerbread is not just for the festive season because you can create the delicious gingerbread recipe by Mary Berry any
Blondies are a delicious dessert that you can enjoy with breakfast, lunch, dinner, or even your afternoon or evening tea.
Chicken Pie Recipe
Chicken Pie Recipe
Enjoying a family meal with loved ones is the top priority of many people. One of the top things you
What Is Chip Steak
What Is Chip Steak
Chip steaks are the type of steaks that people traditionally make with bottom-round beef. The round beef is thinly sliced
Turkey Steak Recipe
Turkey Steak Recipe
Many people might think that turkey and steak don't go together, but that is not the case because you can
Steak Bake Recipe
Steak Bake Recipe
Imagine taking a bite of a steak bake, and what you get is soft and juicy steak along with rich
Sticky Toffee Pudding Recipe Mary Berry
A sticky toffee pudding is a great recipe to serve as dessert at your next dinner. That is because while

The Only Lemon Posset Recipe Mary Berry You Need In Your Life

The lemon posset recipe is a delicious tart that will provide you with a complex layer of flavours. However, the best part is that the tart is simple to make. That is because you only have to chill it in the fridge to ensure that it sets properly. 

Here is what you must know about this recipe to create it quickly. 

The Lemon Posset Recipe Mary Berry Summed Up 

The lemon posset recipe Mary Berry is a beautiful and delicious tart that will take around two hours to prepare. The recipe doesn’t need cooking time, but you must chill it in the fridge before serving at least four hours. The rich and creamy posset tart will serve eight people. 

Details

Servings

8 Person

Prep time

2 Hours

Calories

443

Nutrition Facts

8 servings per container


  • Amount Per ServingCalories443
  • % Daily Value *
  • Total Fat 32.9g 43%
    • Saturated Fat 20.2g 101%
  • Sodium 72mg 4%
  • Total Carbohydrate 34.7g 13%
    • Dietary Fiber 1.9g 7%
    • Total Sugars 16.8g
  • Protein 4.5g 9%

    * The % Daily Value tells you how much a nutrient in a serving of food contributes to a daily diet. 2,000 calories a day is used for general nutrition advice.

    Also Try: Mary Berry Tiramisu Trifle Recipe

    Ingredients 

    Lemon Filling Ingredients

    • 125g caster sugar
    • 575ml double cream 
    • Three lemon juice 
    • Lemon zest 

    Topping Ingredients

    • 175g fresh raspberries 
    • Icing sugar (to dust)

    Pastry Ingredients

    • 50g cold and cubed butter 
    • 150g flour
    • One egg 
    • One tablespoon of icing sugar

    Instructions

    1. Preheat the oven to 180C or 200C/ 

    2. The first thing you must do is create the pastry. You can add the icing sugar, butter, and flour to the food processor. Make sure you let it mix till the consistency is similar to breadcrumbs. 

    3. Then, add the egg to this mixture and let it all mix. 

    4. Take out the mixture from the processor and put it on a work surface that you must dust with flour. Then, start lightly kneading the dough until it has a smooth consistency. 

    5. Roll the dough out thinly and transfer it to your baking dish. Make sure that you line the sides and base with this dough. You can also trim any edges of this pastry and use a fork to make holes in the base. 

    6. Let the baking dish and pastry be inside the fridge for half an hour. 

    7. Take out the baking dish and line it with baking beans and paper and let it bake inside the oven for fifteen minutes. 

    8. Then, take out the beans and paper and keep it in the oven again for five to seven minutes until the pastry is cooked. Take it out of the oven and keep it on the side to let it cool. 

    9. Now that the dough is ready, you need to make the filling. 

    10. Take a shallow saucepan and add cream to it along with lemon zest and sugar. 

    11. Turn on the heat and stir this mixture until the sugar has completely dissolved. 

    12. Turn off the heat from the pan and let it be for five minutes. 

    13. Add the lemon juice and keep stirring until the consistency is thick. 

    14. Let the filling cool for five minutes, and then pour it inside the baking dish. 

    15. Keep the dish inside the fridge and let it chill overnight or for four hours. 

    16. Before serving, you must top the posset tart with raspberries. Slice it into pieces and serve it to your family or guests. 

    Pro Tip: Make the lemon posset tart a day before, and serve it to your guests the following day. Make sure that you decorate it with some fruits. If you don’t have raspberries, use other berries to top the lemon posset tart. 

    Also Read: Delectable Manchester Tart Recipe Mary Berry For Your Next Event

    Nutrient Information 

    The lemon posset tart will have eight servings, and each serving will have 443 calories. Here is the complete nutrient breakdown of the recipe: 

    • Total Fat: 32.9g
    • Saturated Fats: 20.2g
    • Sugar: 16.8g
    • Carbohydrates: 34.7g
    • Dietary Fiber: 1.9g
    • Sodium: 72mg
    • Protein: 4.5g

    Also try: Amazing Paradise Slice Recipe For Dessert Lovers

    Frequently Asked Questions

    Here are some of the most frequently asked questions about the lemon posset recipe Mary Berry:

    Why Is My Lemon Posset Tart Runny?

    The key to making a good tart is making sure that it doesn’t turn out to be runny. If that is the case with you, then it might be because your tart lacks a little bit of acid. That is because the acid in the posset tart is what causes it to become thick. 

    Maybe the lemons that you used in the recipe were not that acidic and more on the sour side. This is why it is crucial to choose acidic lemons. Once you do, the tart will not turn out to be runny and will set beautifully in the fridge. 

    How Long Will My Lemon Posset Tart Keep In The Fridge?

    After you have served the tart, and there are leftovers, you can keep them inside your fridge. They will last for at least three days in the refrigerator. That is because something that contains lemon will not last very long in the fridge because of the acid content. 

    Make sure that you wrap the leftovers or store them inside an airtight container before keeping them in the fridge. Doing this will ensure that they are fresh for three days at least. 

    How Can I Decorate The Lemon Posset Tart?

    The best way to decorate the lemon posset recipe Mary Berry is to use the best and fresh berries at your disposal. You can choose from raspberries, blueberries, blackberries, and many other such fruits. All of them will pair well with the tart. 

    You can also pour some cream on the tart if you like before serving. It will provide the tart with an even richer flavour. However, you can skip doing this if you want to keep the tart light. 

    Why Does My Lemon Posset Tart Not Set?

    The lemon posset recipe Mary Berry should easily set in the fridge because it doesn’t require baking. If this doesn’t happen, then you might not have followed some of the steps properly. This is why it is important to accurately follow all the steps and not make any adjustments to the recipe. 

    Also, check your fridge temperature and make sure it is at the right temperature. Once you do, the tart will set in no time.

    Try This Outclass Kedgeree Recipe By Mary Berry

    Kedgeree is the British version of an Indian dish known as Khichri. The dish goes back more than a thousand years, and you can make it with fish, eggs, and much more. So, here is a complete kedgeree recipe Mary Berry. 

    Everything You Need To Know About The Kedgeree Recipe Mary Berry

    The kedgeree recipe Mary Berry will take ten minutes to prepare and half an hour to cook. The dish will be ready in forty minutes, and it will serve between four to six people. 

    Pro Tip: Make sure you add soft-boiled eggs to this recipe for a delicious taste. It is one of the top ways to enhance the recipe without doing anything complicated. 

    Details

    Servings

    4-6 Servings

    Prep time

    10 Minutes

    Cooking time

    30 Minutes

    Calories

    Nutrition Facts

    4 servings per container


    • Amount Per ServingCalories920
    • % Daily Value *
    • Total Fat 24.2g 32%
      • Saturated Fat 6g 30%
    • Sodium 5079mg 221%
    • Total Carbohydrate 119.4g 44%
      • Dietary Fiber 47.4g 170%
      • Total Sugars 65.6g
    • Protein 57.9g 116%

      * The % Daily Value tells you how much a nutrient in a serving of food contributes to a daily diet. 2,000 calories a day is used for general nutrition advice.

      Ingredients 

      For The Garnish

      • Half a bunch of chopped coriander
      • Three soft-boiled eggs 
      • One thinly sliced large onion

      For The Recipe 

      • 100g of sliced button mushrooms 
      • 350g of smoked haddock fillet (skin should be on)
      • 250g of basmati rice
      • 25g of butter
      • One chopped onion 
      • Two tablespoons of olive oil
      • 550ml of vegetable stock 
      • Salt and pepper to taste 
      • Four tablespoons of double cream 
      • One teaspoon of ground turmeric
      • One tablespoon of curry powder
      • One small lemon (juiced)

      Instructions

      1. Preheat your oven to 180C or 200C. 

      2. Top a baking sheet with a layer of foil. 

      3. Put the haddock on the foil with the skin part down. 

      4. Put half the butter on the top side of the haddock, season it with salt and pepper, and pack it with foil. Make sure you fold all the edges to seal the packet. 

      5. Put the packet in the oven and let it bake for fifteen to eighteen minutes. 

      6. Once the fish is cooked, peel the skin and remove all bones. Keep the haddock aside in the foil to ensure it remains warm. 

      7. Take a large frying pan and pour half of the oil while keeping it on high heat. Fry the onion in the pan for two to four minutes. Then, add the turmeric, curry powder, and rice, and stir it for one minute to coat the rice. 

      8. Add the stock to the pan and keep a lid on it to bring it to a boil, as you let it boil for two minutes. Next, decrease the heat and let the stick simmer for twelve to fifteen minutes. 

      9. Turn off the heat. Mix the haddock and the rice for a delicious kedgeree. 

      Nutrient Information 

      The kedgeree recipe Mary Berry will serve four to six people.

      • Calories 920 per serving.
      • Total Fat: 24.2g 
      • Saturated Fats: 6g
      • Sugar: 65.6g
      • Carbohydrates: 119.4g
      • Dietary Fiber: 47.4g
      • Sodium: 5079mg
      • Protein: 57.9g

      Also Read: What Is Chip Steak? 7 Mouth-Watering Chip Steak Recipes That Will Leave You Wanting More

      Frequently Asked Questions 

      Here are some frequently asked questions about this dish:

      Can You Eat Kedgeree Cold The Next Day?

      Yes, you can consume the kedgeree hot or cold. However, store it in the fridge because room temperature will affect the dish’s integrity. 

      How Long Will Kedgeree Last In The Fridge?

      The kedgeree will last between three and four days in the fridge. Just make sure you keep it inside an airtight container. 

      Should I Use Dyed Or Undyed Smoked Haddock?

      We recommend using undyed smoked haddock for the best results in this dish. In addition, it will enhance the flavor profile of the kedgeree.

      John Torode’s Amazing Beer Can Chicken Recipe

      Beer can chicken is an excellent dish that can help you offer a new but delicious dish to your guests or loved ones. If you want to know how to make this item using a John Torode recipe in the UK, you’re in the right place. Here is what you must know.

      Overview Of John Torode Beer Can Chicken Recipe

      Here is an overview of the John Torode beer can chicken recipe:

      Details

      Servings

      4 Serving

      Prep time

      overnight

      Cooking time

      1 hr. 30 Minutes

      Nutrition Facts


      • Amount Per ServingCalories734
      • % Daily Value *
      • Total Fat 35.1g 45%
        • Cholesterol 41mg 14%
        • Sodium 1059mg 47%
        • Total Carbohydrate 82.8g 31%
          • Dietary Fiber 13.1g 47%
          • Total Sugars 20.2g
        • Protein 27.7g 56%

          * The % Daily Value tells you how much a nutrient in a serving of food contributes to a daily diet. 2,000 calories a day is used for general nutrition advice.

          Ingredients For John Torode Beer Can Chicken Recipe

          • Large whole chicken – 1
          • Beer can – 1
          • Sliced lemon – 1
          • Salt – 1.25 teaspoons
          • Pepper 1.25 teaspoons
          • Chopped parsley – 1 handful
          • Sumac – 1 teaspoon
          • Crushed garlic cloves – 2.5
          • Dijon mustard – 60 grams
          • Vegetable oil – 1.5 tablespoons
          • Brown sugar – 1.25 tablespoons
          • Smoked paprika – 1.25 tablespoons
          • Ground cumin – 1.25 teaspoons
          • Garlic powder – 1.25 teaspoons
          • Mustard powder – 1.25 teaspoons
          • Cayenne pepper – 0.5 teaspoon
          • Chilli powder – 0.5 teaspoon
          • Olive oil – 5 tablespoons
          • Shredded cabbage – ½
          • Black pepper – 1 pinch
          • Parmesan shaving – 60 grams
          • Peeled large potatoes (cut in half) – 7

          Instructions For John Torode Beer Can Chicken Recipe

          Here are the steps you must follow for the John Torode beer can chicken recipe:

          1. Prepare seasoning mix by adding salt, pepper, parsley, sumac, and crushed garlic in a bowl
          2. Mix the ingredients properly, and then use a tablespoon to place the mixture inside the chicken cavity
          3. After adding the powdered seasoning, add sliced lemon pieces inside the cavity and place the chicken horizontally on a tray
          4. Take out mustard in a bowl, add vegetable oil to it, and mix the ingredients
          5. Use another clean bowl to prepare the spice mix for the chicken
          6. Add brown sugar, paprika, cumin, garlic powder, mustard powder, cayenne pepper, and chilli powder in the bowl. Mix all the spices
          7. Wear a glove on one of your hands and use that hand to rub the chicken with the mustard
          8. Then take the spice mix bowl and a handful of the mixture you formed to rub the mustard chicken with the spices. It will take a few turns to completely use the mixture
          9. Let the marinated chicken stay in the fridge overnight
          10. The following day, keep a half-filled beer can on your baking tray and fit the chicken on it
          11. You should place the chicken properly so that the can is within the cavity of the beer
          12. Preheat your oven
          13. Place the cut potatoes on the side of the chicken in the tray
          14. Put the baking tray in the oven and let the dish cook for 1 hour and 15 minutes at 200 degrees
          15. Take olive oil, cabbage, and pepper to form a quick slaw. Add parmesan shavings to it
          16. Once the chicken is cooked, let it rest and then carve it before serving

          Pro Tips: Make sure the can is not half-filled or less with beer because the beverage will not boil in the oven

          Nutritional Information

          • Calories – 734
          • Total Fat – 35.1 grams
          • Cholesterol – 41 milligrams
          • Sodium – 1059 milligrams
          • Total Carbohydrate – 82.8 grams
          • Dietary Fiber – 13.1 grams
          • Total Sugars – 20.2 grams
          • Protein – 27.7 grams

          Also Read: Chicken Pie Recipe For True Food Lovers

          FAQs

          How To Store John Torode Beer Can Chicken?

          The best way to store the chicken leftovers is by keeping them in an airtight container. You can store the dish in the fridge for up to three days.

          How To Improve The Taste Of Potatoes In Beer Can Chicken?

          If you want your potatoes to have a zesty taste, you can take a handful of sumac and rub the powder on your potatoes. Do this before roasting the item in the oven.

          The Timeless Gingerbread Recipe by Mary Berry

          Gingerbread is not just for the festive season because you can create the delicious gingerbread recipe by Mary Berry any time of the year. It is incredibly easy to make, and everyone will love this timeless recipe. So, if you want to create a timeless gingerbread recipe Mary Berry, you are in the right place. 

          What You Must Know About The Gingerbread Recipe by Mary Berry 

          The gingerbread recipe takes a total of 50 minutes to make. It will take you fifteen minutes to prepare the ingredients and thirty-five minutes to cook this recipe. It will also serve twenty-four people, as you can cut it into 24 pieces. 

          Details

          Servings

          24

          Prep time

          15

          Cooking time

          35

          Calories

          92

          Nutrition Facts


          • Amount Per ServingCalories92
          • % Daily Value *
          • Total Fat 3.1g 4%
            • Saturated Fat 1.8g 9%
          • Sodium 86mg 4%
          • Total Carbohydrate 15.2g 6%
            • Dietary Fiber 0.3g 2%
          • Protein 1.5g 3%

            * The % Daily Value tells you how much a nutrient in a serving of food contributes to a daily diet. 2,000 calories a day is used for general nutrition advice.

            Ingredients 

            • 75g of diced butter 
            • 200g of self-rising flour
            • 75g of golden syrup 
            • 75g of black treacle 
            • One teaspoon of soda bicarbonate 
            • One teaspoon of mixed spice 
            • Two tablespoons of ground ginger 
            • 75g of muscovado sugar
            • 250ml of milk (full-fat)
            • One beaten egg 

            Instructions

            1. Preheat your oven to 160C or 180C. 

            2. Line a baking dish of 9 by 12 inches with a baking sheet. 

            3. Take out a large mixing bowl and add the ginger, flour, mixed spices, and soda bicarbonate. 

            4. Put a small saucepan on gentle heat and let the syrup, butter, sugar, and treacle mix until the butter melts. Once it does, you must set the pan aside so it can cool down. 

            5. Pour the saucepan mixture inside the mixing bowl with the dry ingredients. 

            6. Add the egg and beat it all until everything is combined. Next, slowly pour the milk into the batter until it is soft and smooth. 

            7. Pour the batter into the baking dish and let it bake for thirty-five minutes. The cake should be a little bouncy when you touch it. 

            8. Take out the cake, let it cool, and cut it into twenty-four pieces. 

            Also Read: Mary Berry’s Delicious and Mouth-Watering Carrot Cake Recipe For Carrot Lovers

            Pro Tip: You can top the gingerbread with some vanilla icing if you want to boost the flavor and add some creaminess to the cake. You can easily create vanilla icing at home and spread it over the cake. If you are serving this to kids, you can also top it with sprinkles or festive decorations. 

            Nutrient Information 

            The gingerbread recipe Mary Berry will serve twenty-four people. Each square will have 92 calories. Here is the rest of the nutrient breakdown:

            • Total Fat: 3.1g
            • Saturated Fats: 1.8g
            • Sugar: 6.3g
            • Carbohydrates:15.2g
            • Dietary Fiber: 0.3g
            • Sodium: 86mg
            • Protein: 1.5g

            Frequently Asked Questions 

            Here are some of the frequently asked questions about the gingerbread recipe Mary Berry:

            What Can I Eat With The Gingerbread?

            The gingerbread pairs perfectly well with tea, coffee, and other items you can consume in the evening. Besides that, it will also pair well with other types of desserts. So, you can keep them with every meal as a dessert or tea. 

            We recommend you enjoy this with a delicious hot chocolate or coffee cup. It will enhance the flavor of the gingerbread even more.

            How Can I Store The Gingerbread?

            You can keep the gingerbread in an airtight container and store it in the fridge. It will remain good for a few days. 

            Make sure that you consume this bread within four to seven days for the best results. You can also freeze it and consume it within three months. 

            Can I Make This Bread A Day Before?

            Yes, you can make the gingerbread a day before you want to serve it. All you have to do is reheat it before serving, and it will be as good as new. 

            Make A Delicious White Chocolate Blondie recipe Inspired by Mary Berry

            Blondies are a delicious dessert that you can enjoy with breakfast, lunch, dinner, or even your afternoon or evening tea. The blondie recipe Mary Berry is one of the easiest recipes to make that will provide delicious blondies. 

            Here is a complete recipe. 

            An Overview Of The Blondie Recipe Mary Berry 

            The blondie recipe Mary Berry takes forty-five minutes to make. It will take you ten minutes to prepare the ingredients and half an hour to thirty-five minutes to bake the dish. The best part is that this recipe feeds sixteen people, making it ideal for parties. 

            Pro Tip: You can top the blondies with melted chocolate or other spreads. It will further enhance the taste and make the blondies creamier and moister. 

            Details

            Servings

            16

            Prep time

            10 Minutes

            Cooking time

            45 Minutes

            Calories

            214

            Nutrition Facts

            16 servings per container


            • Amount Per ServingCalories214
            • % Daily Value *
            • Total Fat 8.3g 11%
              • Saturated Fat 3.1g 16%
            • Sodium 23mg 1%
            • Total Carbohydrate 32.9g 12%
              • Dietary Fiber 0.9g 4%
              • Total Sugars 24.4g
            • Protein 3.4g 7%

              * The % Daily Value tells you how much a nutrient in a serving of food contributes to a daily diet. 2,000 calories a day is used for general nutrition advice.

              Ingredients 

              • 160g of chopped white chocolate 
              • 150g of Stork spread
              • 210g of muscavado sugar 
              • 35g of almonds (grounded)
              • 160g of plain flour 
              • One teaspoon of vanilla extract 
              • Two large eggs (beaten)
              • One teaspoon of baking powder

              Instruction

              1. The first thing you must do is preheat your oven to 350F or 180C. 

              2. Then, take a baking dish of eight inches. 

              3. Melt the Stork spread and line the baking dish with the melted spread at the bottom. Besides that, you should line the sides of the dish with baking paper. 

              4. Take a mixing bowl, and add the entire list of ingredients to it, with the exception of the chocolate. Beat it all together till the mixture has a smooth consistency. 

              5. Add the chocolate, mix it all up, and pour the mixture into the baking dish. 

              6. Keep the dish in the middle of the oven and let it bake between half an hour and thirty-five minutes. You can also check if it has been cooked by inserting a toothpick in the middle. It should come out a little sticky. 

              7. Take the dish out, let it cool, and then keep it on a wire rack. 

              8. Once the blondies are completely cool, cut them into sixteen squares. 

              Nutrient Information 

              In the blondie recipe, you will create sixteen squares. Each square will contain roughly 214 calories. Here is the remaining nutrient breakdown: 

              • Total Fat: 8.3g
              • Saturated Fats: 3.1g
              • Sugar: 24.4g
              • Carbohydrates: 32.9g
              • Dietary Fiber: 0.9g
              • Sodium: 23mg
              • Protein: 3.4g

              Frequently Asked Questions 

              Here are some questions people ask about the blondie recipe Mary Berry:

              Should Blondies Be Firm In The Middle?

              Blondies need to have some chewiness in the middle. Such a texture is ideal, which is why you have to leave it slightly undercooked. If you want a firm texture, you can bake it for an extra five minutes. 

              Why Are They Called Blondies?

              Blondies got this name because they are just blonde brownies. You will notice this in the color of the brownie, as it will be light brown or beige. 

              Can I Store Blondies In The Fridge?

              Yes, you can. Please keep them in an airtight container in the fridge. They will stay good for a few days.

              Chicken Pie Recipe For True Food Lovers

              Enjoying a family meal with loved ones is the top priority of many people. One of the top things you can do for such a dinner is chicken pie. The dish will warm you up while satiating your hunger.
              Fortunately, you don’t have to worry about finding a good recipe for this dish. This guide has everything you need. So let’s dive into the specifics of making a chicken pie for your family in the UK or elsewhere.

              Chicken Pie Recipe

              The best thing about making a chicken pie is you don’t have to worry much. Whatever recipe you use, the steps will be easy to follow. This chicken pie recipe will help you enjoy a serving of six.
              You can prepare the items for the dish in half an hour to one hour. It will take up to two hours for the pie to cook perfectly. Remember being patient will benefit you because the dish will be very delicious.

              Details

              Servings

              6

              Prep time

              30-60 Minutes

              Cooking time

              2 hrs.

              Nutrition Facts

              1 servings per container


              • Amount Per ServingCalories1027
              • % Daily Value *
              • Total Fat 65.6g 85%
                • Cholesterol 123mg 41%
                • Sodium 748mg 33%
                • Total Carbohydrate 73.4g 27%
                  • Dietary Fiber 3.8g 14%
                  • Total Sugars 3.5g
                • Protein 130.1g 261%

                  * The % Daily Value tells you how much a nutrient in a serving of food contributes to a daily diet. 2,000 calories a day is used for general nutrition advice.

                  Ingredients

                  • Chicken legs (without skin) – 7
                  • Diced celery sticks – 5
                  • Bay leaves (chopped) – 5
                  • White wine – 220 ml
                  • Chicken stock – 320 ml
                  • Chopped large onion – 2
                  • Butter – 60 grams
                  • Plain flour – 70 grams
                  • Crème fraiche – 3 tablespoons
                  • Mustard – 1.5 tablespoon
                  • Puff pastry (ready-made roll) – 2 packs of 375 grams
                  • Beaten egg – 2
                  • Salt – a pinch
                  • Pepper – a pinch

                  How To Make Chicken Pie?

                  Here are the steps for making a tasty chicken pie:

                  • Preheat your oven to a temperature of 160 degrees and 140 degrees fan with gas level 3
                  • Take a large saucepan and put the chicken with celery and bay leaves on it
                  • Pour wine, then stock in the pan
                  • Use salt and pepper to season the items
                  • Keep the stove at medium heat and allow the chicken mixture to boil
                  • Cover your pan with a lid and place it in the oven
                  • Let the chicken cook in the oven for 35 minutes or until the legs become tender
                  • Keep the chicken aside for cooling
                  • Once the legs are cool, remove bones from every piece
                  • Tear the chicken into small pieces and transfer the pieces to a bowl
                  • Strain the stock from the saucepan in a clean container. You may throw out the bay leaves, but keep the celery
                  • Take a frying pan and heat it to medium level
                  • Add onions to the pan and cook for about ten minutes until the vegetable softens
                  • Place butter in the pan and stir until it melts
                  • Sprinkle the flour to create a thick sauce
                  • Pour the strained stock into the pan and stir at high heat
                  • Add some salt and pepper to season the sauce
                  • You should also add the kept celery, crème fraiche, and mustard to the pan
                  • Mix the items with the sauce, then add chicken to the pan
                  • Take the filling from the pan and add it to an ovenproof dish. Using a spoon will be helpful
                  • Let the filling cool a bit, then cover the dish with a lid and keep it in the fridge for half an hour
                  • Take out the pastry sheets on your work surface and roll them to a thickness of 3 mm
                  • Cut each piece with a width of 3 cm
                  • You will need about 16 rolls to cover the ovenproof dish
                  • Combine the ribbons in a weaving pattern until the top is enough to cover the pie
                  • Keep the pastry in the fridge for 15 minutes
                  • Take out the chicken filling from the fridge and brush the beaten egg on the sides of the dish
                  • Place the pastry top on the pie
                  • Change your oven temperature to 200 degrees and fan to 180 degrees with the gas level at 6
                  • Brush your pastry with the remaining egg and bake for half an hour

                  Also Read: A Succulent Chicken Steak Recipe For A Healthy Meal

                  Pro Tip For The Chef

                  Make sure to weave the pastry rolls tightly to form a good top so that no filling can escape

                  Nutritional Information

                  • Calories – 1027
                  • Total Fat – 65.6 grams
                  • Cholesterol – 123 milligrams
                  • Sodium – 748 milligrams
                  • Total Carbohydrate – 73.4 grams
                  • Dietary Fiber – 3.8 grams
                  • Total Sugars – 3.5 grams
                  • Protein – 30.1 grams

                  FAQs

                  Can You Make Chicken Pie After One Day?

                  If you keep the filling covered in the fridge, you can make this pie even after two days of preparing the filling. You can also keep the pastry top in the fridge for longer than 15 minutes.

                  What Is Chip Steak? 7 Mouth-Watering Chip Steak Recipes That Will Leave You Wanting More

                  Chip steaks are the type of steaks that people traditionally make with bottom-round beef. The round beef is thinly sliced and pounded, which makes the steak more tender. These days, people also use meat from the loins to make chip steaks. Chip steaks are usually used in sandwiches and Philly steaks. However, you can use them in several other dishes as well.

                  Chip steaks are usually sold in a frozen state. However, even if you want to make chip steaks at home, it is recommended to keep them frozen for at least 24 hours before you can cook them.

                  Origins Of Chip Steak

                  William Dubil first introduced chip steaks in 1963. It was an accidental invention, as William Dubil did not mean to freeze a piece of bottom-round beef. However, when he saw that he had accidentally frozen the bottom round beef, he cut it into small and thin slices and placed it in the refrigerator.

                  He thought the meat would go bad after some time, but to his surprise, the beef did not go bad, and that is when he knew he had something special. Dubil is the one who named this type of thinly sliced beef Chip Steak. Over time there have been certain variations and upgrades to chip steaks. The way they are prepared has also changed so that the chip steaks are more nutritious and hygienic.

                  Also Read: A Complete Guide On How To Cook James Martin’s Fillet Steak

                  7 Chip Steak Recipes That Everyone Should Try

                  Let’s look at some of the best chip steak recipes out there.

                  Chip Steak and Rice

                  Chip Steak and Rice

                  This is one of the most delicious chip steak recipes out there. And the best part about this recipe is that it is easy to make and does not require a lot of ingredients. You can serve chip steak with fried or plain white rice. You can use diced onion and paprika to sauté the chipped steak. After you sauté the chipped steak, add beef broth and a mixture of healthy vegetables.

                  To finish the dish, let the mixture simmer for several minutes or until the sauce thickens and the flavours meld together. You can even add a dash of red wine for extra flavour. Finally, serve the chip steak and rice with steamed or roasted vegetables, or enjoy it as is.

                  This dish is sure to become a family favourite and will be requested repeatedly. So whether you’re cooking for a special occasion or just a weeknight dinner, this chip steak and rice recipe is a winner.

                  Chip Steak And Eggs

                  Chip Steak and Egg

                  This is another fantastic recipe that is perfect for your weeknight dinner. But that is not the only time you can enjoy chip steak; you can also eat chip steak and eggs at breakfast. First, use delicious items like mushroom, pepper and onion to sauté the chip steak. Then, you can serve it with a fried egg or omelette or make any other type of egg you like.

                  This is the perfect breakfast for people who strictly follow a beef diet. It can be challenging for beef lovers to choose a suitable dish for their breakfast routine, but this dish can bring much-needed flavour to their breakfast.

                  Crispy Chip Steak

                  Crispy Chip Steak

                  If you like Crispy chip steak, this recipe is perfect. It takes very little time to cook, but you might have to start preparations one day before the cooking day. You have to keep the steak marinated overnight. You can marinate it in soy sauce, lemon juice, garlic and mixed herbs.

                  An oven is one of the best ways to cook crispy chipped steak. However, people also use an air fryer for cooking crispy chip steak. Cook the steak for around 10 minutes, and your crispy chip steak will be ready. You can top it off with cheese and enjoy it with a tasty glass of wine.

                  Chip Steak Sandwich

                  Chip Steak Sandwich

                  This is one of the most popular chip steak dishes. The sandwich is known for its tender texture, which is usually crispy on the outside and juicy on the inside. The thinly sliced cooked steak is served on a bun or a roll. You can also use toasted bread to make the sandwich, but it tastes better with a burger bun. Next, make a mixture of garlic powder, flour, paprika, onion powder, pepper and eggs. You can use this mixture to coat the thinly sliced beef.

                  Many people like to toast the buns; however, you can also serve the sandwich without toasting the buns as well. If you bring your lunch to work or are always on the go, a chip steak sandwich can be the ideal dish for you.

                  Chip Steak Salad

                  Chip Steak Salad

                  A chip steak salad can be a tasty and satisfying meal with a balance of flavours and nutrients. It can be a great dish for people following a strict diet schedule. Of course, the fruits and vegetables you add to the salad affect its calorie count, but overall this is a nutritious and healthy dish loved by people looking to stay fit.

                  Whether you enjoy it as a main dish or as a side, it just makes you want more. Chip steak salad has thinly sliced and tenderized beef steak as the main ingredient. The steak is usually cooked and then served on top of a bed of greens along with various other ingredients such as vegetables, fruits, cheese, and dressing.

                  You can add your favourite vegetables to the mix as well. The deliciousness of a chip steak salad lies in the combination of flavours and textures. The fruits and vegetables you add to the salad are responsible for the dish’s exquisite taste and unique texture.

                  The steak adds a protein-rich element to the salad, making it a nutritious meal. The key to making a delicious chip steak salad is to use high-quality ingredients, such as freshly cooked steak, crisp and fresh greens, and a tasty dressing. You can also add other ingredients of your choice, such as cheese, fruits, nuts, or croutons, to enhance the flavour and texture of the salad.

                  Garlic Butter Chipped Steak

                  Garlic Butter Chipped Steak

                  Garlic Butter Chipped Steak is a delicious and flavorful dish cooked in butter and garlic. The beef steak is seasoned with salt and pepper and then seared in a hot pan until it is crispy on the outside and juicy on the inside. The melted garlic butter creates a delicious sauce drizzled over the steak, adding depth and complexity to the dish.

                  This dish is perfect for those who love food items with garlicky flavours. The combination of tender beef steak and garlicky butter creates a harmonious balance of flavours. The steak provides a satisfying chew, and the garlic butter adds a smooth, rich sauce. The dish can be served on its own, with a side of vegetables, or on top of a bed of pasta or rice. Regardless of how it’s served, Garlic Butter Chipped Steak is sure to be a crowd-pleaser, providing a delicious and satisfying meal that is both hearty and flavorful.

                  Chip Steak With Mushroom Gravy

                  Chip Steak With Mushroom Gravy

                  Chip steak with mushroom gravy is a flavorful and comforting dish. The chip steak, also known as minute steak or round steak, is a thin cut of beef that is usually pounded thin, then seasoned and pan-fried until it’s crispy and tender. Adding mushroom gravy, made with mushrooms, onions, and a mixture of broth and seasonings adds a depth of flavour to the dish.

                  The tender pieces of steak are enveloped in mushroom gravy, creating a perfect balance of textures and taste. The exquisite flavours of the mushrooms combined with the beefiness of the steak and the gravy make a genuinely mouth-watering dish that will satisfy your cravings. Whether served over a bed of mashed potatoes, rice, or egg noodles, chip steak with mushroom gravy is sure to be a hit.

                  The Best Time To Eat Chip Steaks

                  You can see that there are different variations of the chip steak, each with its unique properties. For example, some Chip steak recipes tend to be more delicious than others, while recipes like chip steak salads are more focused on the health side of the dish.

                  On the other hand, a Chip steak sandwich can be a tremendous on-the-go dish. So there is no specific time or occasion to eat chip steaks. Whether morning or night, weekend or weekday, you are sure to find a variety of chip steaks you can enjoy.

                  Final Words

                  Chip steak is a versatile and delicious cut of beef that you can prepare in various ways. So whether you’re looking for a quick and easy weeknight dinner or a hearty and satisfying meal, there’s a chip steak recipe for everyone.

                  From classic chip steak sandwiches to chip steak and gravy over mashed potatoes, these seven best chip steak recipes showcase the versatility and deliciousness of this often-overlooked cut of beef. So whether you’re a seasoned cook or just starting in the kitchen, give chip steak a try and discover why it’s a favourite among home cooks and food lovers.

                  A Quick Turkey Steak Recipe For Busy Nights

                  Many people might think that turkey and steak don’t go together, but that is not the case because you can easily create a turkey steak in no time. These are flavorful, tender, moist, and incredibly delicious. The best part is that our turkey steak will be ready in less than half an hour.

                  So, here is a quick turkey steak recipe for the nights you are busy.

                  Turkey Steak Recipe Overview

                  The turkey steak recipe will take five minutes to prepare and twenty minutes to cook. As a result, you only need less than half an hour to make this recipe. It will also serve five people, which is why you can enjoy it with your family.

                  Ingredients

                  • Five turkey steaks
                  • 1 tbsp. butter
                  • 1 tsp. thyme
                  • 1 tsp. garlic salt
                  • 3 tbsp. balsamic dressing

                  Instructions

                  1. Preheat your oven to 375 degrees.

                  2. Take the turkey steak and dip each of them in the balsamic dressing. Then, add the turkey inside the baking dish and add it with spices. After that, put some butter on top of the turkey.

                  3. Bake the turkey breasts for twenty to twenty-five minutes.

                  4. Make sure that the internal temperature of the steak is 165 degrees. When it comes to that temperature, it means that the steak has been fully cooked.

                  Nutrient Information

                  The turkey steak recipe will serve five people. Each serving will have 198 calories. Here is the breakdown per serving of the remaining nutrients:

                  • Total Fat: 6g
                  • Saturated Fats: 2g
                  • Sugar: 1g
                  • Carbohydrates: 1g
                  • Dietary Fiber: 0g
                  • Sodium: 528mg
                  • Protein: 32g

                  Frequently Asked Questions

                  Here are some frequently asked questions about our turkey steak recipe:

                  What Side Dishes Can I Serve With The Turkey Steak?

                  Whenever you make this dish, make sure that you serve it with some delicious side dishes. We recommend that you serve them with garlic-roasted green beans, Brussels sprouts, rice, mashed potatoes, coleslaw, corn on the cob, and much more. All of these side dishes will complement the flavour of the turkey steaks really well.

                  You can also serve it with classic side dishes such as a sweet potato casserole, cornbread, and more. The key is to see what you like and then serve it with the turkey steak.

                  How Long Will The Turkey Steak Last In The Fridge?

                  You can take the turkey steak and store it in an airtight container. Then, keep the container in the fridge, and it will easily last for five days. Make sure that you don’t consume it after that, or the taste will not be the same.

                  When you want to consume turkey steak, you can easily reheat it in the microwave. However, make sure that you don’t overcook it in the microwave, or the steaks will become dry.

                  How Do I Make The Turkey Steaks Even More Tender And Moist?

                  The best part is that you can make the turkey steaks even more tender and moist using a few tricks. For example, you can cook the steaks with a marinade or sauce of your choice. Doing this will add more flavour and also guarantee that the turkey steaks remain juicy and moist.

                  Besides that, it is also crucial that you don’t overcook the turkey steaks. Again, the key is to check the temperature and make sure that it is at 165F. Once it reaches that point, you must take out the steaks from the oven.

                  What Does A Turkey Steak Taste Like?

                  You can think of the turkey steak as having the texture of chicken but with a much stronger flavour. You will find that it resembles the taste of Cornish duck or hen. That is why it is important not to let the turkey steak get dry.

                  If you are looking for this strong flavour, you can opt for turkey and create sides that you think to work well with chicken. The same sides will work well with a turkey steak in no time.

                  Is Turkey Healthier Than Beef?

                  Turkey and beef are both great sources of protein that will provide you with fat and protein. However, turkey is lower in saturated fat than beef. That is why it is much better for your heart health than red meat.

                  Turkey is a source of lean meat, which is why it is a great low-calorie option for you to lose weight. So, if you are health conscious, you can make these turkey steaks in no time for a healthy yet light dinner or lunch whenever you like.

                  A Quick Turkey Steak Recipe For Busy Nights

                  Recipe by EmmaCourse: Course, Mains
                  Servings

                  5

                  servings
                  Prep time

                  5

                  minutes
                  Cooking time

                  20

                  minutes
                  Calories

                  198

                  kcal

                  INGREDIENTS

                  • Five turkey steaks

                  • 1 tbsp. butter

                  • 1 tsp. thyme

                  • 1 tsp. garlic salt

                  • 3 tbsp. balsamic dressing

                  INSTRUCTIONS

                  • Preheat your oven to 375 degrees.
                  • Take the turkey steak and dip each of them in the balsamic dressing. Then, add the turkey inside the baking dish and add it with spices. After that, put some butter on top of the turkey.
                  • Bake the turkey breasts for twenty to twenty-five minutes.
                  • Make sure that the internal temperature of the steak is 165 degrees. When it comes to that temperature, it means that the steak has been fully cooked.

                  Nutrition Facts

                  5 servings per container


                  • Amount Per ServingCalories198
                  • % Daily Value *
                  • Total Fat 6g 8%
                    • Saturated Fat 2g 10%
                  • Sodium 528mg 23%
                  • Total Carbohydrate 1g 1%
                    • Dietary Fiber 0g 0%
                    • Total Sugars 1g
                  • Protein 32g 64%

                    * The % Daily Value tells you how much a nutrient in a serving of food contributes to a daily diet. 2,000 calories a day is used for general nutrition advice.

                    A Savory Steak Bake Recipe To Satisfy Your Inner Baker

                    Imagine taking a bite of a steak bake, and what you get is soft and juicy steak along with rich gravy in a buttery pastry. Yes, such a steak bake will feel as if it has come right out of your dreams. However, you can easily make this at home with the right ingredients and techniques.

                    So, if you want to create a savory and juicy steak bake recipe, then you have come to the right place. Here is a complete recipe to satisfy your inner baker.

                    Steak Bake Recipe Overview

                    The savoury steak bake recipe will take fifteen minutes to prepare and one hour and five minutes to cook. Then, you will have to let them cool for an hour, which means it will take a total of two hours and twenty minutes to make these. The recipe will also serve four people, with one slice each.

                    Pro Tip: We recommend that you cut the rectangles very neatly. That is because if it has random shapes, then you will not be able to pair them properly and seal the edges. So, make sure that everything is as equal as possible.

                    Ingredients

                    • 75g onion
                    • 450g rump steak
                    • One tablespoon of vegetable oil
                    • One egg
                    • 375g of puff pastry
                    • 25g of beef stock
                    • 300ml of water

                    Instructions

                    1. Prepare the rump steak by making sure it is thoroughly dry before you begin cutting it.

                    2. Then, cut the steak into cubes of one centimetre. Keep in mind that it doesn’t matter if some pieces are small while others are large. That is because such pieces will enhance the texture of the dish.

                    3. Peel the onions and prepare them by dicing them or grating them. We would recommend that you use a small food processor for this, as it will save you effort and time.

                    4. Put a kettle on the boil.

                    5. Take a medium frying pan, and heat one tablespoon of vegetable oil on high. Then, add the steak pieces.

                    6. Let the steak fry on high heat and keep stirring till all the sides are brown.

                    7. Then, add the onions and let the mixture for at least a minute or so.

                    8. Measure the 300ml of boiling water, add it to the pan, and add the beef stock.

                    9. Stir everything in the pan and bring it all to a boil.

                    10. After that, turn down the heat to the lowest option and cover the pan with a foil or lid. Let the mixture simmer for at least forty-five minutes.

                    11. Once you open the lid, the beef should be soft and tender, and some of the liquid should be left. You can also simmer for a little longer if you want to get the texture right.

                    12. Transfer the beef to a bowl and set it aside so it can cool properly.

                    13. Preheat your oven to 210C.

                    14. Roll out the pastry into rectangles of 35cm x 25cm. You can also use an already rolled sheet on the board if you wish.

                    15. Cut up the pastry into eight equal rectangles.

                    16. Line a baking tray with parchment paper. Then, carefully place half of the rectangles on the tray.

                    17. Spoon a quarter of the beef mixture on every piece of pastry.

                    18. Take one egg, beat it in a bowl, and use a pastry brush to put an egg wash on the exposed pastry edges.

                    19. Cover the pieces with the remaining pastry and use your fingers to mush the edges together.

                    20. Use a fork to seal the pastry edges.

                    21. Take a sharp knife and use the top to make slashes in the pastry. Make sure that you are not cutting the pastry all the way through while doing this.

                    22. Use more of the egg and wash it over the pastry slices and their tops.

                    23. Let it bake in the oven for twenty to twenty-five minutes or till it is golden brown.

                    24. Serve the pastry with sides of your choice.

                    Also Read: A Complete Guide On How To Cook James Martin’s Fillet Steak

                    Nutrient Information

                    Our steak bake will serve four people. Each serving will have 767 calories. Here is the remaining nutrient breakdown:

                    • Total Fat: 51.7g
                    • Saturated Fats: 14.8g
                    • Sugar: 1.6g
                    • Carbohydrates: 44.2g
                    • Dietary Fiber: 1.8g
                    • Sodium: 489mg
                    • Protein: 31.5g

                    Frequently Asked Questions

                    Here are some frequently asked questions about the steak bake recipe:

                    How Do I Serve The Steak Bake?

                    You can serve the steak bake with fries, gravy, vegetables, dauphinoise potatoes, baked beans, and much more. Of course, it is up to you what sides you want to choose to enjoy with the meal. Just make sure that you are not choosing anything too heavy, as the steak bake is already really filling.

                    Is Steak Bake Healthy?

                    A single steak bake serving has more than 700 calories, so it is not the healthiest option you will have at your disposal. It has a high fat and carbohydrate content that makes it a heavy dish. If you want to be healthy, you will have to opt for other options.

                    For example, having steak on its own will be a much healthier option. That is because the pastry adds a lot of calories that will be heavy on your stomach.

                    Can I Make My Steak Bake Diary Free?

                    You can make the steak bake dairy free by selecting a puff pastry that has no milk in it. You must check the ingredients of the puff pastry you choose and check if it has milk or not. Once you check this, you will have a dairy-free puff pastry in no time.

                    Can I Eat The Steak Bake Right Out Of The Oven?

                    Keep in mind that even if the pastry is not too hot from the outside, the filling will be incredibly hot. That is why we don’t recommend that you eat it straight out of the oven. Instead, you need to let it cool.

                    You can also cut the pastry in half and let the filling inside cool down before you can begin consuming it. Once you do, you will not burn yourself while eating the steak bake.

                    Why Should I Let The Filling Cool Before Adding It To The Pastry?

                    You must be patient and let the filling cool completely before you add it to the pastry. If it is warm, then the pastry will become warm, and this will affect the layers, which means that the pastry will not rise properly.

                    The more you let it cool, the better it will be because the layers will remain intact, and it will rise in the best way possible.

                    How Do I Reheat The Leftover Steak Bakes?

                    The best part about steak bakes is that you can also eat them cold if you have stored them in the fridge for later consumption. However, you can also eat them warm by heating them in the microwave or warming them in the oven. Once you do, they will be crispy again without using an oven.

                    We recommend against freezing the steak bakes because they will not taste as nice when you reheat them. So, make sure you cook enough so they last in the fridge for a few days before you can consume them.

                    A Savory Steak Bake Recipe To Satisfy Your Inner Baker

                    Course: Beef, Mains
                    Servings

                    4

                    servings
                    Prep time

                    15

                    minutes
                    Cooking time

                    1

                    hour 

                    5

                    minutes
                    Calories

                    767

                    kcal

                    INGREDIENTS

                    • 75g onion

                    • 450g rump steak

                    • One tablespoon of vegetable oil

                    • One egg

                    • 375g of puff pastry

                    • 25g of beef stock

                    • 300ml of water

                    INSTRUCTIONS

                    • Prepare the rump steak by making sure it is thoroughly dry before you begin cutting it.
                    • Then, cut the steak into cubes of one centimetre. Keep in mind that it doesn’t matter if some pieces are small while others are large. That is because such pieces will enhance the texture of the dish.
                    • Peel the onions and prepare them by dicing them or grating them. We would recommend that you use a small food processor for this, as it will save you effort and time.
                    • Put a kettle on the boil.
                    • Take a medium frying pan, and heat one tablespoon of vegetable oil on high. Then, add the steak pieces.
                    • Let the steak fry on high heat and keep stirring till all the sides are brown.
                    • Then, add the onions and let the mixture for at least a minute or so.
                    • Measure the 300ml of boiling water, add it to the pan, and add the beef stock.
                    • Stir everything in the pan and bring it all to a boil.
                    • 10. After that, turn down the heat to the lowest option and cover the pan with a foil or lid. Let the mixture simmer for at least forty-five minutes.
                    • 11. Once you open the lid, the beef should be soft and tender, and some of the liquid should be left. You can also simmer for a little longer if you want to get the texture right.
                    • 12. Transfer the beef to a bowl and set it aside so it can cool properly.
                    • 13. Preheat your oven to 210C.
                    • 14. Roll out the pastry into rectangles of 35cm x 25cm. You can also use an already rolled sheet on the board if you wish.
                    • 15. Cut up the pastry into eight equal rectangles.
                    • 16. Line a baking tray with parchment paper. Then, carefully place half of the rectangles on the tray.
                    • 17. Spoon a quarter of the beef mixture on every piece of pastry.
                    • 18. Take one egg, beat it in a bowl, and use a pastry brush to put an egg wash on the exposed pastry edges.
                    • 19. Cover the pieces with the remaining pastry and use your fingers to mush the edges together.
                    • 20. Use a fork to seal the pastry edges.
                    • 21. Take a sharp knife and use the top to make slashes in the pastry. Make sure that you are not cutting the pastry all the way through while doing this.
                    • 22. Use more of the egg and wash it over the pastry slices and their tops.
                    • 23. Let it bake in the oven for twenty to twenty-five minutes or till it is golden brown.
                    • 24. Serve the pastry with sides of your choice.

                    Notes

                    • We recommend that you cut the rectangles very neatly. That is because if it has random shapes, then you will not be able to pair them properly and seal the edges. So, make sure that everything is as equal as possible.

                    Nutrition Facts

                    4 servings per container


                    • Amount Per ServingCalories767
                    • % Daily Value *
                    • Total Fat 51.7g 67%
                      • Saturated Fat 14.8g 74%
                    • Sodium 489mg 22%
                    • Total Carbohydrate 44.2g 17%
                      • Dietary Fiber 1.8g 7%
                      • Total Sugars 1.6g
                    • Protein 31.5g 63%

                      * The % Daily Value tells you how much a nutrient in a serving of food contributes to a daily diet. 2,000 calories a day is used for general nutrition advice.

                      Wow Your Guests With This Sticky Toffee Pudding Recipe Mary Berry

                      A sticky toffee pudding is a great recipe to serve as dessert at your next dinner. That is because while it is gooey and sticky, it is also easy to make and light to eat. You can easily cut the squares from the dish and serve the sauce to each of your guests.

                      Here is the complete sticky toffee pudding recipe Mary Berry that you can use.

                      Sticky Toffee Pudding Recipe Mary Berry Overview

                      The sticky toffee pudding recipe Mary Berry takes less than half an hour to prepare. On the other hand, the cooking time will also vary between half an hour to an hour. So, in total, it will take you an hour and thirty to minutes to make at maximum.

                      A pro tip we recommend is that you can also make this recipe a day ahead and reheat it when you need to serve it. On the other hand, you can easily make the sauce three days before. All you have to do is cover and store it in the fridge and serve it when needed.

                      Ingredients

                      For The Pudding

                      • 175g of muscovado sugar
                      • 100g of butter
                      • 275ml of full-fat milk
                      • 225g of self-rising flour
                      • One teaspoon of bicarbonate soda
                      • One teaspoon of baking powder
                      • Two large eggs
                      • Three tablespoons of black treacle
                      • Vanilla ice cream or double cream (for serving)

                      For The Sauce

                      • 125g of muscovado sugar
                      • 100g of butter
                      • 300ml of double cream
                      • One tablespoon of black treacle
                      • One teaspoon of vanilla extract

                      Instructions

                      1. Preheat the oven to 180C.

                      2. Take a shallow yet wide ovenproof dish of 1.7 litres and butter it properly.

                      3. Take a mixing bowl, and add the treacle, eggs, sugar, butter, soda bicarbonate, and baking powder. Use an electric handheld whisk to beat all the ingredients until they have been combined. Gradually start pouring the milk and whisk till it is smooth.

                      4. Pour the mixture into the ovenproof dish.

                      5. Bake the dish for thirty-five or forty-five minutes. Another rule is to let it bake until it has risen well and it is springy in the middle.

                      6. It is time to make the sauce by adding all the ingredients in a saucepan and stirring them over low heat until the butter melts and the sugar dissolves. Then, bring it to a boil, and stir it for a minute.

                      7. Finally, you serve the sticky toffee pudding recipe by pouring half the sauce over the baking dish.

                      8. You can also serve this with ice cream if you wish.

                      Also Read: The Original Buxton Pudding Recipe: One Of England’s Most Delicious Treat

                      Nutrient Information

                      Our sticky toffee pudding recipe Mary Berry will provide six servings. Each serving will have around 135 calories. The rest of the nutrient breakdown of each serving includes the following:

                      • Total Fat: 8.1g
                      • Saturated Fats: 4.98g
                      • Sugar: 9.63g
                      • Carbohydrates: 15.06g
                      • Dietary Fiber: .25g
                      • Sodium: 78.33mg
                      • Protein: 1.43g

                      Frequently Asked Questions

                      Here are some frequently asked questions about our sticky toffee pudding recipe Mary Berry:

                      What Alternative Can I Use For Treacle In Sticky Toffee Pudding?

                      If you don’t have treacle available, you can always use dark corn syrup or golden syrup as the best alternative. If you also don’t have these, then you can add twenty grams of extra brown sugar in the sponge and an extra ten grams inside the sauce.

                      Doing this will help you get the moisture and consistency you require. So, make sure that you are using these substitutes in place of treacle.

                      How Long Will The Sticky Toffee Pudding Stay Good In The Fridge?

                      The best part is that the sticky toffee pudding can easily last in the fridge for eight weeks. You can cover the pudding and keep consuming it till this time limit. After that, it is best to let it go, as the texture and taste will be compromised a little.

                      On the other hand, you can also freeze the sticky toffee pudding. It will easily last for six months inside the freezer. Keep in mind to reheat it properly whenever you take it out so you can enjoy the pudding in the best way possible.

                      What Is The Best Thing To Serve With The Sticky Toffee Pudding?

                      The best things that you can serve with the sticky toffee pudding are cream or vanilla ice cream, depending on what you prefer better. Besides that, you can also serve it with custard, if that is what you like. All of these side servings will provide the pudding with an additional richness of flavour.

                      You can experiment with these various servings and then decide what you think is best. If you are having a dinner or a party, you can provide various options to your guests. So, they can choose what they like with the sticky toffee pudding recipe Mary Berry.

                      Wow Your Guests With This Sticky Toffee Pudding Recipe Mary Berry

                      Course: Desert, Mary Berry
                      Servings

                      6

                      servings
                      Prep time

                      30

                      minutes
                      Cooking time

                      45

                      minutes
                      Calories

                      814

                      kcal

                      INGREDIENTS

                      • For The Pudding
                      • 175g of muscovado sugar

                      • 100g of butter

                      • 275ml of full-fat milk

                      • 225g of self-rising flour

                      • One teaspoon of bicarbonate soda

                      • One teaspoon of baking powder

                      • Two large eggs

                      • Three tablespoons of black treacle

                      • Vanilla ice cream or double cream (for serving)

                      • For The Sauce
                      • 125g of muscovado sugar

                      • 100g of butter

                      • 300ml of double cream

                      • One tablespoon of black treacle

                      • One teaspoon of vanilla extract

                      INSTRUCTIONS

                      • Preheat the oven to 180C.
                      • Take a shallow yet wide ovenproof dish of 1.7 litres and butter it properly.
                      • Take a mixing bowl, and add the treacle, eggs, sugar, butter, soda bicarbonate, and baking powder. Use an electric handheld whisk to beat all the ingredients until they have been combined. Gradually start pouring the milk and whisk till it is smooth.
                      • Pour the mixture into the ovenproof dish.
                      • Bake the dish for thirty-five or forty-five minutes. Another rule is to let it bake until it has risen well and it is springy in the middle.
                      • It is time to make the sauce by adding all the ingredients in a saucepan and stirring them over low heat until the butter melts and the sugar dissolves. Then, bring it to a boil, and stir it for a minute.
                      • Finally, you serve the sticky toffee pudding recipe by pouring half the sauce over the baking dish.
                      • You can also serve this with ice cream if you wish.

                      Notes

                      • A pro tip we recommend is that you can also make this recipe a day ahead and reheat it when you need to serve it. On the other hand, you can easily make the sauce three days before. All you have to do is cover and store it in the fridge and serve it when needed.

                      Nutrition Facts

                      6 servings per container


                      • Amount Per ServingCalories814
                      • % Daily Value *
                      • Total Fat 48.6g 63%
                        • Saturated Fat 29.9g 150%
                      • Sodium 470mg 21%
                      • Total Carbohydrate 90.4g 33%
                        • Dietary Fiber 1g 4%
                        • Total Sugars 58.1g
                      • Protein 8.6g 18%

                        * The % Daily Value tells you how much a nutrient in a serving of food contributes to a daily diet. 2,000 calories a day is used for general nutrition advice.